To configure Microsoft Outlook 2007 to send and receive email using our servers using IMAP and SMTP over SSL/TLS, please follow the steps below.
1. Open Microsoft Outlook 2007.
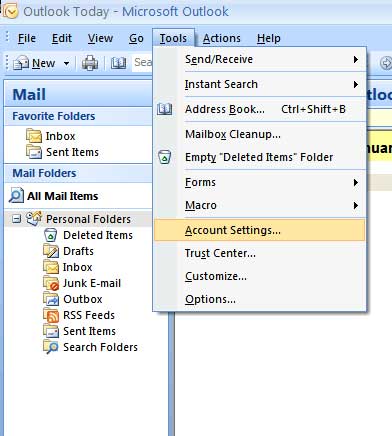
2. Choose "Tools" -> "Account Settings.
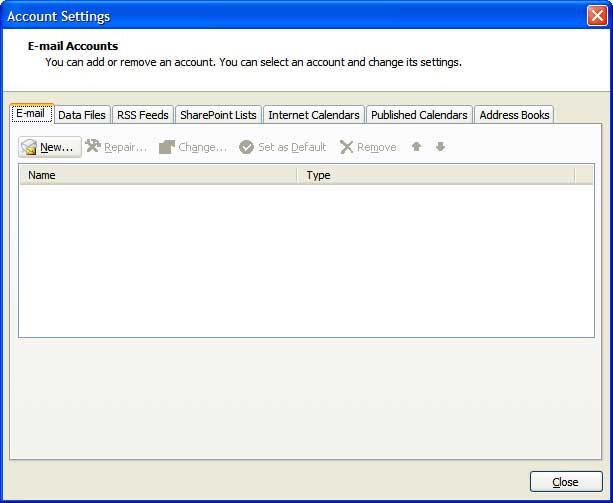
3. Click on the "New" button in the "E-Mail" tab.
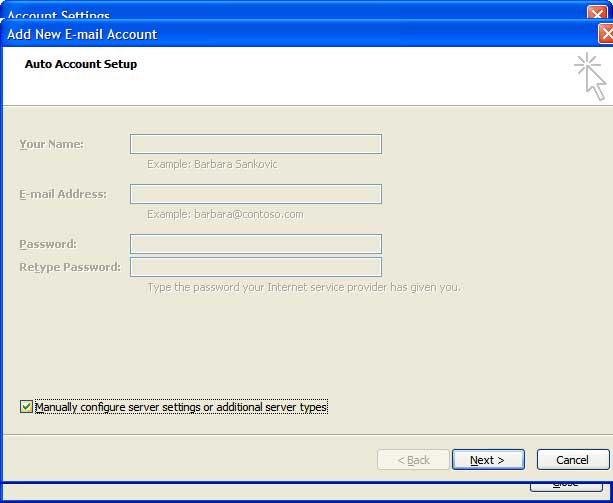
4. Select "Manually configure server settings or additional server types" and click on "Next".
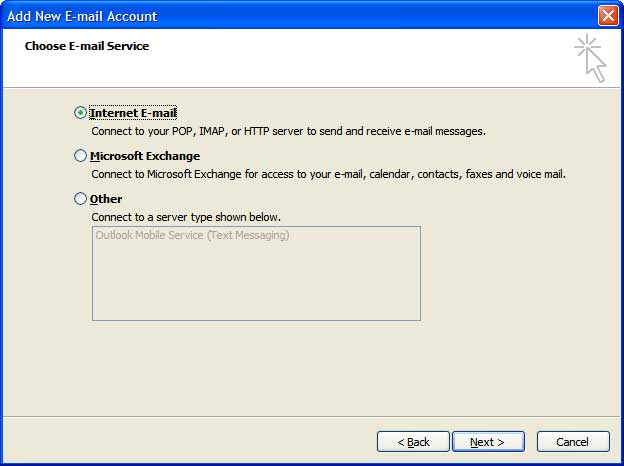
5. Choose "Internet E-mail" and click on "Next".
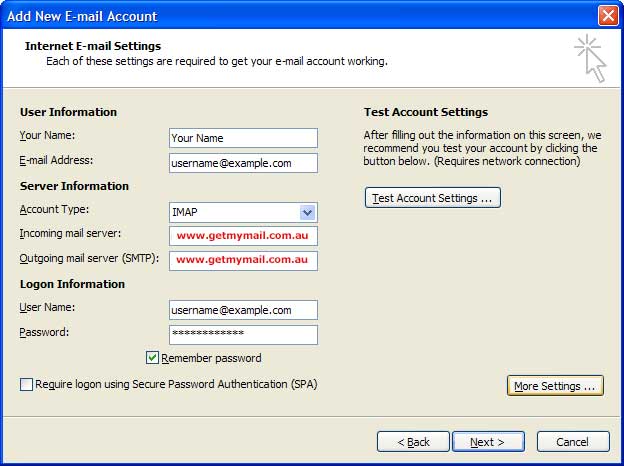
6. In the "Your name" field you should enter the name which you would like to appear on the messages you send.
You need to enter your e-mail address username@example.com in the "E-mail Address" field.
Select "IMAP" for account type.�
For incoming and outgoing mail servers you should use www.getmymail.com.au
Make sure you use your FULL email address for the username. In the "Password" field you need to enter the current password for this particular mailbox.
Leave the "Log on using Secure Password Authentication (SPA)" option unchecked and click on "More Settings".
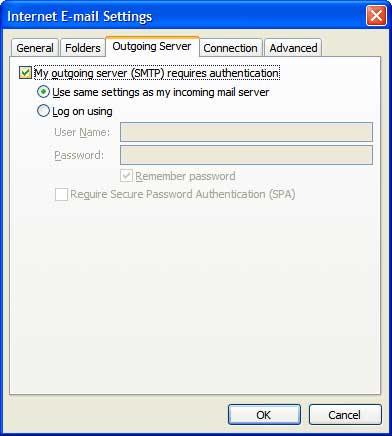
7. Click on the "Outgoing Server" tab.�
Mark the "My outgoing server (SMTP) requires authentication" option.
Leave the "Use same settings ans my incomming mail server" set as default.
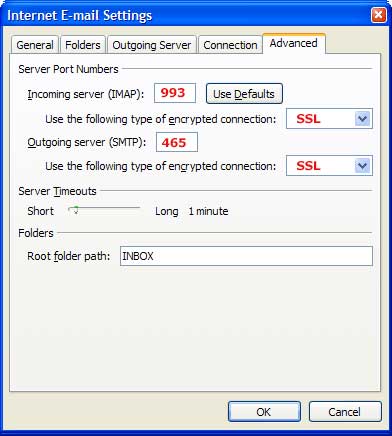
8. Click on the "Advanced" tab.
Next to "Use the following type of encrypted connection:" under "Incoming server (IMAP)" choose�SSL�from the drop-down menu.
Set the "Outgoing server (SMTP)" port to�465.
Next to "Use the following type of encrypted connection:" under "Outgoing server (SMTP)" choose SSL�from the drop-down menu.
Set the "Incoming server" (IMAP) port to 993.
Click on "OK".
9. Click on "Next"
10. Click on "Finish".

Congratulations your new email account is now setup and ready to use.
3. Click on the "New" button in the "E-Mail" tab.
4. Select "Manually configure server settings or additional server types" and click on "Next".
5. Choose "Internet E-mail" and click on "Next".
6. In the "Your name" field you should enter the name which you would like to appear on the messages you send.
You need to enter your e-mail address username@example.com in the "E-mail Address" field.
Select "IMAP" for account type.�
For incoming and outgoing mail servers you should use www.getmymail.com.au
Make sure you use your FULL email address for the username. In the "Password" field you need to enter the current password for this particular mailbox.
Leave the "Log on using Secure Password Authentication (SPA)" option unchecked and click on "More Settings".
7. Click on the "Outgoing Server" tab.�
Mark the "My outgoing server (SMTP) requires authentication" option.
Leave the "Use same settings ans my incomming mail server" set as default.
8. Click on the "Advanced" tab.
Next to "Use the following type of encrypted connection:" under "Incoming server (IMAP)" choose�SSL�from the drop-down menu.
Set the "Outgoing server (SMTP)" port to�465.
Next to "Use the following type of encrypted connection:" under "Outgoing server (SMTP)" choose SSL�from the drop-down menu.
Set the "Incoming server" (IMAP) port to 993.
Click on "OK".
9. Click on "Next"
10. Click on "Finish".
Congratulations your new email account is now setup and ready to use.
