Please note: Using the file manager in the wrong way can destroy your website files (DELETE THEM) and or make your website un-usable. Please be carefull.
File manager allows you to fully manage file system within the hosting space. You can browse, copy, move, rename, delete files and folders; change files and folders permissions; create new files and folders; upload, zip, unzip files through your web browser. Frankly speaking, there is no necessity in FTP as it could be completely replaced by file manager.
To open File Manager click its link in the hosting space left navigation menu:
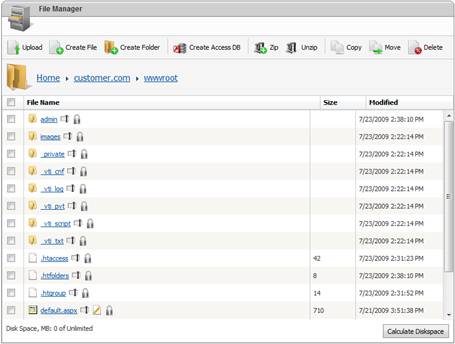
To browse folders click their links in the files list pane. You could use path breadcrumb to navigate folders above up to Home folder � root folder of your hosting space.
To upload new files click Upload button:
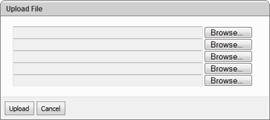
Click Browse... button to browse files on your local drive. You could upload up to 5 files in the same time. Click Upload button to upload files into your hosting space.
To create new text file click Create File button

Specify file name with extension and optional file contents. Click Create button to create a file.
To create new folder click Create Folder button:

Specify folder name and click Create button.
To zip files and folders select them in files list:

Specify archive name and click Zip button. For archiving control panel supports zip format only supported in most operating systems.
To unzip selected archive click Unzip button. Archive will be unpacked in the current folder, so make sure you copied it into the right location.
To copy selected files and folders click Copy button:
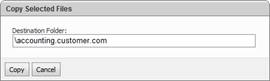
Specify destination folder or pick it from file selector and click Copy button to complete operation.
To move selected files and folders click Move button
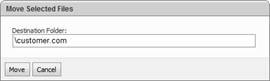
Specify destination folder or pick it from file selector and click Move button to complete operation.
To create a new empty Microsoft Access 2000 database click Create Access DB button:
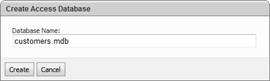
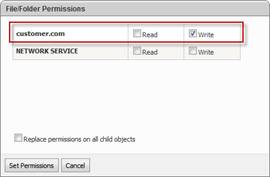
Specify database file name and then click Create button. You could access your database from the application by creating ODBC data source or by specify direct path to it in the connection string. To allow your web site write access to the database click Lock icon on its file in the files list and then tick Write checkbox over desired web site:
Alternatively, you could create a database in web sites Data folder (Home -> Web site name -> Data) which allows write access by default.
File Manager allows you to recalculate disk space consumption by clicking Calculate Diskspace button in the bottom of File Manager screen:
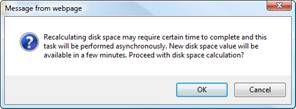
Disk space calculation could take some time, so it will be run asynchronously. No need to click Calculate Diskspace button twice.
